DoorMaster User Guide
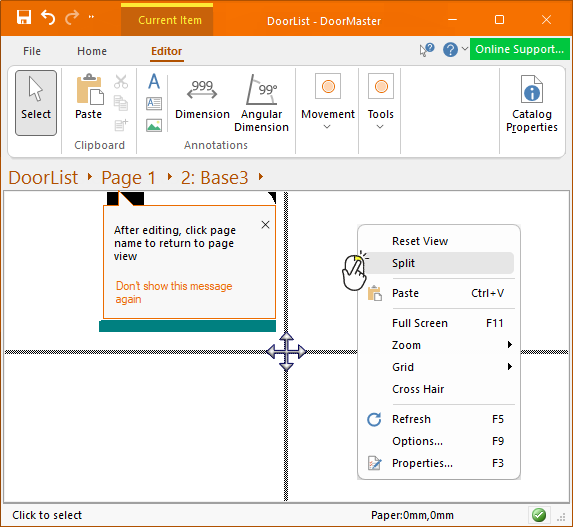
When in Editor mode, this menu is accessed by right clicking mouse on a blank area of a drawing page.
 |
 click on the area of interest.
Reduces the magnitude of the view. This is useful if you lose the image.
This is especially useful when manually zooming in 2D View.
Before using the wheel to zoom in, click on area that you want to get a closer look at. If you loose focus, use the Reset View and try again.
Allows you to work in multiple views, e.g. ‘List View’ while still being able to see the effect in other views by splitting the screen.
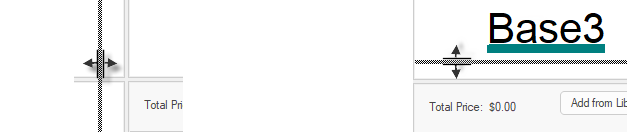
The Split command initially attempts to create four (4) panes, as shown above. However, dragging the splitter bar allows you to reduce this to two (2) panes by splitting a window vertically, horizontally, or both.
When you hover over the splitter bar, the cursor will change. In the example below we dragged...
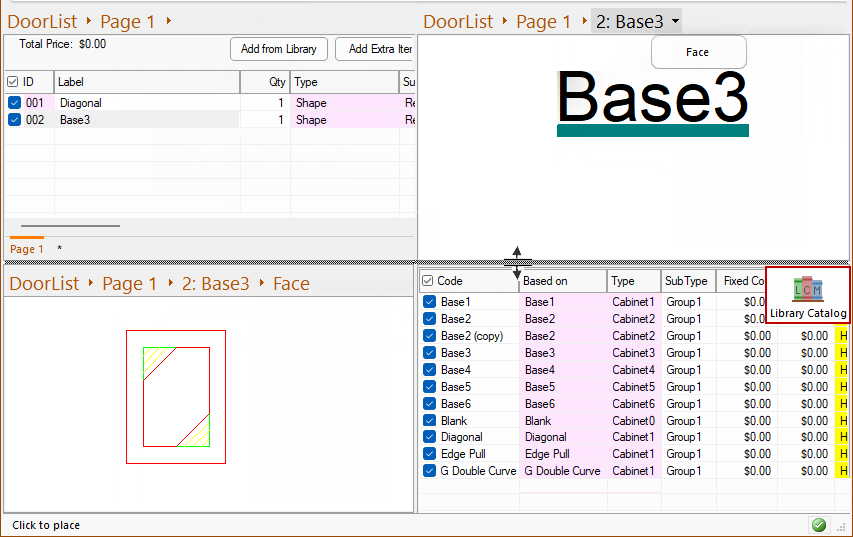
The initial split will be into four (4) panes. To do this...
- Right click on blank area of your drawing to bring up a menu from which you can select the Split command option.
- This will bring up a cross hair as shown below.
- To make each the current active pane, click in any of the available pane areas
- Then use the Breadcrumbs bar to select the item/part that you want to see.
- In the following example, the selections are...
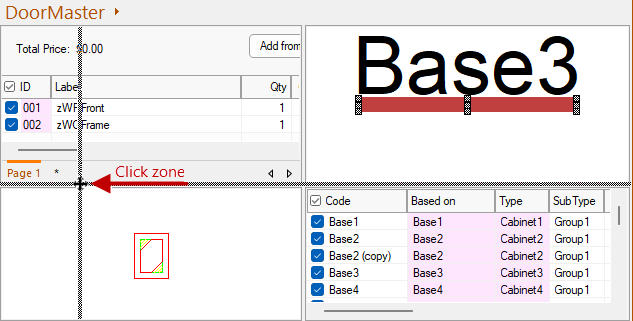
- Pane 1 - is List View with a list of shapes in the drawing/job
- Pane 2 - the door "Base3" which will present the Current Item command ribbon.
- Pane 3 - the door section, "Face", and zoomed in.
- Pane 4 - the Library Catalog Manager
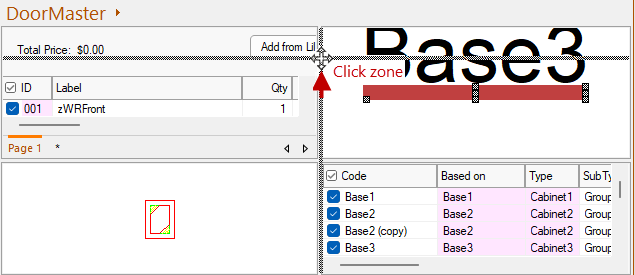
Notice that the horizontal splitter bar is selected which allows you to change the size or reduce the number of panes.
Split into Top/Bottom panes
Move your mouse to the far left hand side of the application window.
- This creates only two (2) viewing panes, one pane on top and one pane on the bottom. (Click image to view)
Click to view top/bottom i.e split into 2 panes.
Split into Left/Right panes
Move your mouse back to the centre and move it vertically to the top of the application window.
- This creates two (2) viewing panes, one pane to the left and one pane to the right. (Click image to view)
Click to view left/right i.e. split into 2 panes
Paste
Keyboard Shortcut: Ctrl+V
Inserts a copy of the Clipboard contents onto the drawing page.
Full Screen
Keyboard Shortcut: F11
Expand the view to the entire screen.
To return to normal view, use Keyboard Shortcut F11 or 'Close Full Screen' button.
Zoom
The term for changing the magnification is 'zooming'. You can zoom in to make objects appear large and to reveal more detail, or zoom out to see a larger portion of the plan.
If manually zooming in 2D View, before using the wheel to zoom in, click on area that you want to get a closer look at. If you loose focus, use the Reset View and try again.
For full discussion refer to topic on Zoom.
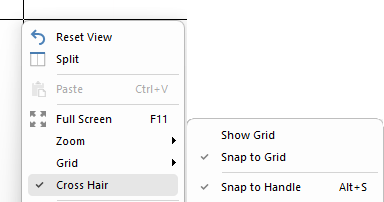
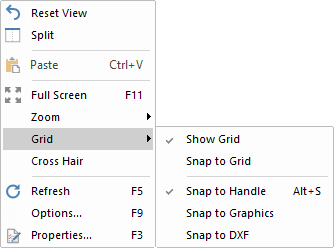
Show Grid
The Grid is just a series of lines arranged in columns and rows on the page and helps you line up objects visibly. It also allows for placement using the Snap to Grid snapping option, which can be turned on or off.
Snap To
You should always have one type of snap enabled. Which one you use depends upon what you are trying to accomplish.
There are times when it may be necessary to turn off snap completely to position a difficult door, however these situations are rare.Snap to Grid
Toggles the use of grid snapping, which means that any object placed on the drawing page will automatically be moved to the nearest grid point for accurate alignment.
Snap to Grid is often used for positioning objects, ensuring that the cursor will 'jump' to whole units as defined in File Options.
When Snap to Grid is Off, the snap distance setting is set to a fixed pixel distance or a when On, a multiple of the grid density.
The display of the grid is independent to operation of the snap i.e. it is possible to have Snap to Grid activated but have the actual Grid hidden.
This means that you can have the grid hidden, yet still have objects snap to grid points.
Snap to Handle
Toggles the use of handle snapping, which is not related to grids. Handles are the small squares on the corners and mid-points of rectangular objects.
Enabling handle snapping in 2D view means that when you place an object near another one, the handles on its corners will try and align themselves with the handles on the other object. The object will jump next to the other one as its handles overlap, meaning that aligns itself exactly.
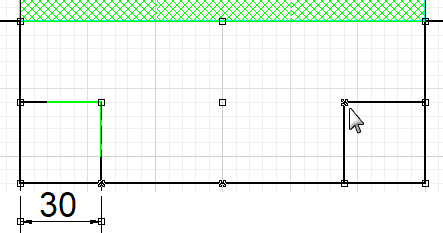
It is also useful for accurately adding dimensions. The image shows handles on a flap with a dimension added to confirm the width of the added corner notch.
Snap to Graphics
Controls whether you can snap to a graphics item.
Snap to DXF
This allows you to import a dxf.
Cross Hair
Toggles the display of a large crosshair which extends all the way across the drawing page. To enable, ensure option is ticked. To disable, untick the option.
The crosshair is useful for aligning objects over the width of the page and is also used to Split Windows. It will Snap to Grid or Snap to Handle, if those options are enabled.
Refresh
Keyboard Shortcut: F5
Refreshes the window. In DoorMaster this recreates the page and optionally recalculates the formulae within all visible doors, and all the sections they may import.Options
Keyboard Shortcut: F9
Not applicable for DoorMaster.
Properties
Keyboard Shortcut: F3
Not applicable for DoorMaster.
This is the same as a ribbon command that is turned off - see Advanced File Options.